全局配置
首先在全局范围内启用签名功能
1
2
3
|
git config --global gpg.format ssh
git config --global commit.gpgsign true
git config --global tag.gpgsign true
|
创建 git 配置目录,并写入配置文件
 1
 2
 3
 4
 5
 6
 7
 8
 9
10
11
12
|
mkdir -p ~/.config/git
vim ~/.config/git/allowed_signers
# 在 `allowed_signers` 文件中添加允许的公钥
# 格式为 `<user.mail> <key-type> <public-key>`
# 例如:
# user@example.com ssh-ed25519 AAAAC3NzaC1lZDI1NTE5AAAAICIoZ...

# 设置文件权限
chmod 600 ~/.config/git/allowed_signers

# 应用该文件
git config --global gpg.allowedSignersFile ~/.config/git/allowed_signers
|
使用自定义配置文件快速为不同 GitHub 账号设置签名
官方文档:Git - git-config Documentation
例如为 GitHub 用户 abc 创建配置文件:~/.config/git/abcconfig
 1
 2
 3
 4
 5
 6
 7
 8
 9
10
11
12
13
14
15
16
17
|
[user]
    email = 12345678+abc@users.noreply.github.com
    name = abc
    signingkey = ~/.ssh/id_ed25519_abc.pub

[gpg]
    format = ssh

[gpg "ssh"]
    allowedSignersFile = ~/.config/git/allowed_signers
    # 应当包含 abc 的公钥

[commit]
    gpgsign = true

[tag]
    gpgsign = true
|
在实际使用中,一个 repo 内可执行以下操作一键配置:
1
|
git config --local include.path ~/.config/git/abcconfig
|
随后即可使用 abc 账号进行 commit 签名.
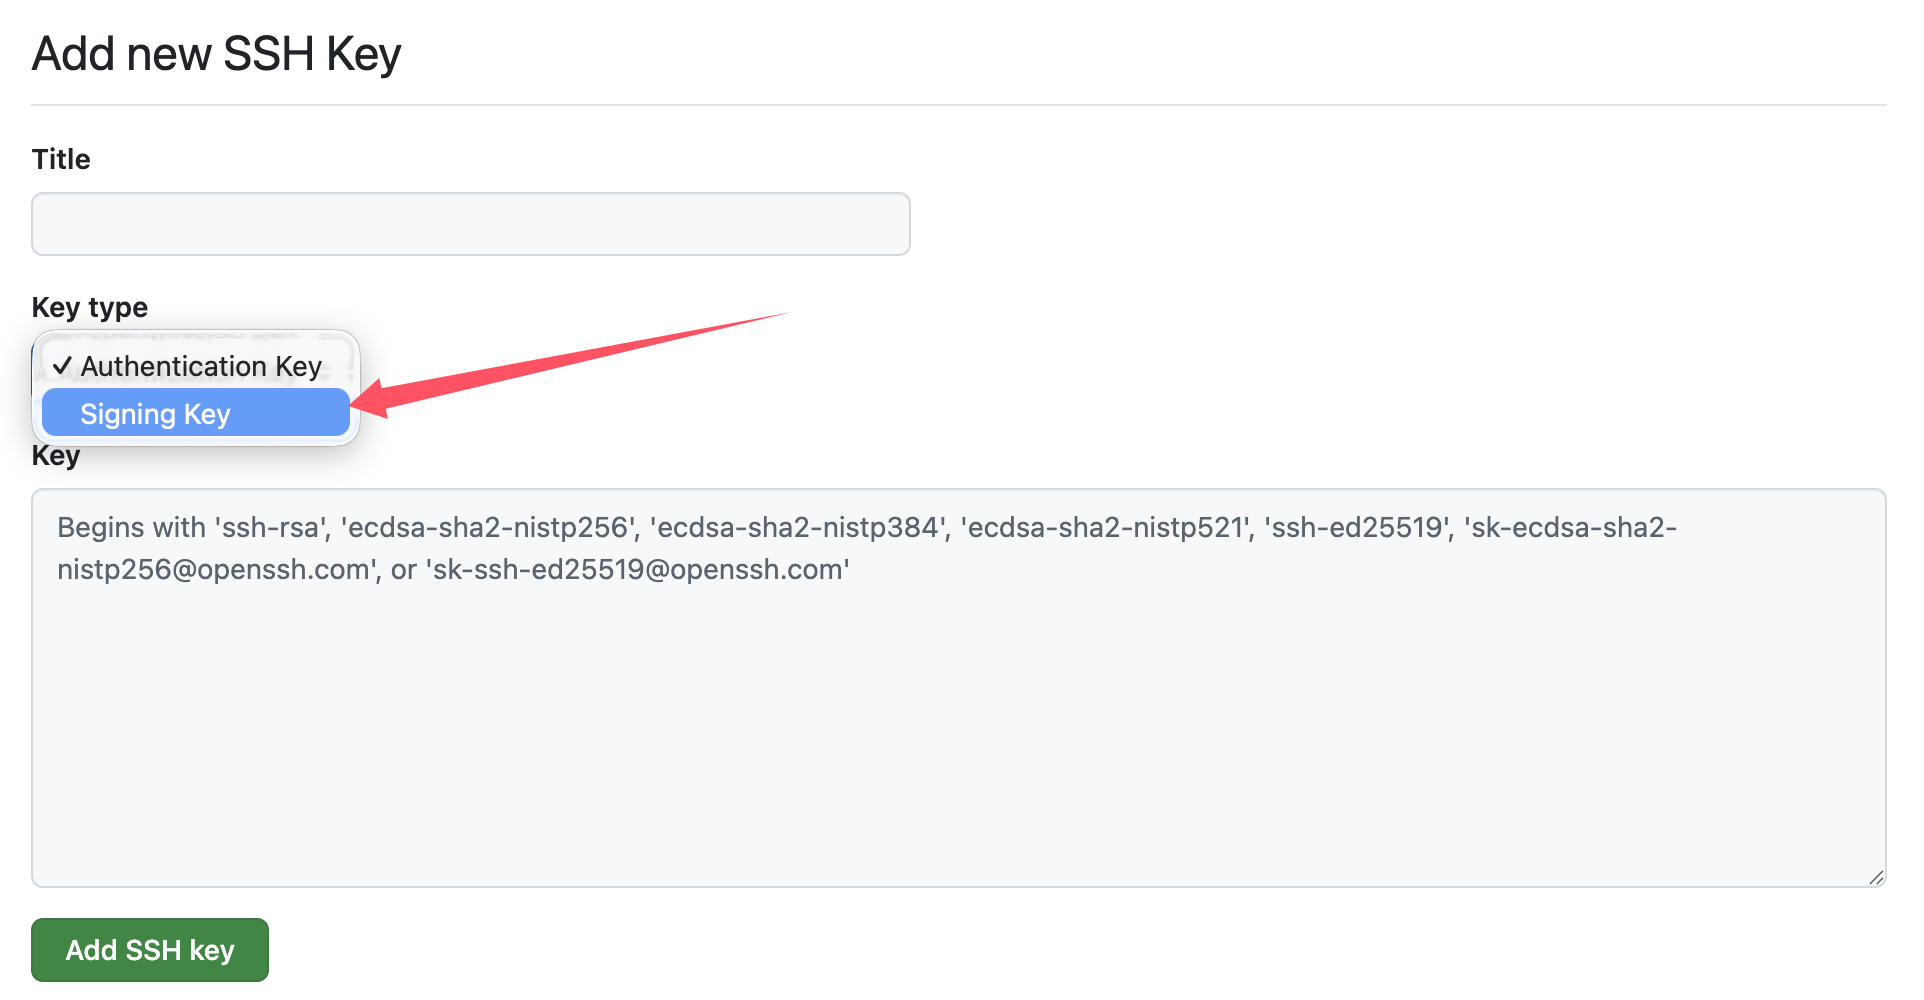
注意签名所用 ssh key 需要单独额外在 GitHub 上传一次公钥并选定为 signing key: